Introduction
This document is an attempt at saving the documentation for the original Stepper Motor Hat v0.1 before it disappears entirely from the net. Some of this is culled from wayback machine archives, some of it modern information gleaned during my own investigation of this expansion board for the Raspberry Pi (40-pin GPIO)
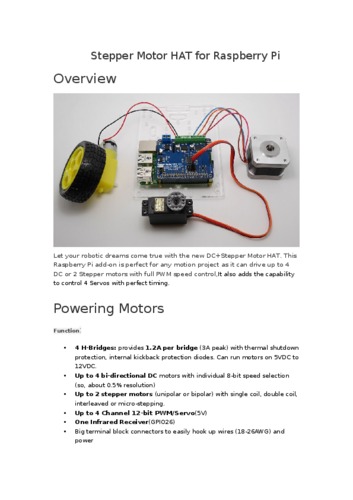
Stepper Motor Hat v0.1This HAT supports up to 2 stepper motors. The python library works identically for bi-polar and uni-polar motors Running a stepper is a little more intricate than running a DC motor but its still very easy


Function:
- 4 H-Bridges:provides 1.2A per bridge (3A peak) with thermal shutdown protection, internal kickback protection diodes. Can run motors on 5VDC to 12VDC.
- Up to 4 bi-directional DC motors with individual 8-bit speed selection (so, about 0.5% resolution)
- Up to 2 stepper motors (unipolar or bipolar) with single coil, double coil, interleaved or micro-stepping.
- Up to 4 Channel 12-bit PWM/Servo(5V)
- OneInfrared Receiver(GPIO26)
- Big terminal block connectors to easily hook up wires (18-26AWG) and power
- Polarity protected 2-pin terminal block and jumper to connect external 5-12VDC power
- Works best with Raspberry Pi model A+, B+, or Pi 2;
More detail please refer to Stepper-Motor-HAT-User-Guide1.pdf
Voltage requirements
The first important thing to figure out what voltage the motor is going to use. If you're lucky your motor came with some sort of specifications. Some small hobby motors are only intended to run at 1.5V, but its just as common to have 6-12V motors. The motor controllers on this HAT are designed to run from 5V to 12V.
MOST 1.5-3V MOTORS WILL NOT WORK or will be damaged by 5V power
Current requirements
The second thing to figure out is how much current your motor will need. The motor driver chips that come with the kit are designed to provide up to 1.2 A per motor, with 3A peak current.
Note that once you head towards 2A you'll probably want to put a heat-sink on the motor driver, otherwise you will get thermal failure, possibly burning out the chip.
If you don't have to take your project on the go, the 9V 1A, 12V 1A, or 12V 5A will work nicely 99% of 'weird motor problems' are due to having a voltage mismatch (too low a voltage, too high a voltage) or not having a powerful enough supply! Even small DC motors can draw up to 3 Amps when they stall.
Power it up
Wire up your battery pack to the Power terminal block on the right side of the HAT. It is polarity protected but still its a good idea to check your wire polarity. Once the HAT has the correct polarity, you'll see the LED light up
Please note the HAT does not power the Raspberry Pi, and we strongly recommend having two seperate power supplies - one for the Pi and one for the motors, as motors can put a lot of noise onto a power supply and it could cause stability problems!
How to use the IR receive function
Please refer to Raspberry Pi IR Control Expansion Board
PS: Only exist IR receive function for expansion board;
User Guide
step 1: Your must enable I2C interface;
step 2: install tool software.
sudo apt-get install python-dev
sudo apt-get install python-smbus
sudo apt-get install i2c-tools
step 3: run the sample code;
wget http://terminus.attitude.net/local--files/stepper-motor-hat-v01/Raspi-MotorHAT.zip
unzip Raspi_MotorHAT.zip
cd Raspi_MotorHAT
chmod +x *.py
sudo python DualStepperTest.py
sudo python StepperTest.py
Sample Python Code
Raspi-MotorHAT.zip